
Hidden gems of ServiceNow #2: Studio and how we used it to develop our 1st ServiceNow app!
More and more companies around the globe are using ServiceNow, but how many of them are truly leveraging the potential of their mobile apps ?
It’s been three months since we, at ASP, first dove into the ServiceNow Mobile Experience. Now, we have agreed it was time to share our findings and insights about this topic. Most of the time, ServiceNow users simply opt for the desktop experience. What is often disregarded, is that mobile could make their life easier in various ways.
From a practical point of view, three different ServiceNow apps are available. The Mobile Agent app will offer a fulfiller experience by providing all the necessary tools to service desk agents in order to resolve daily issues whilst the Now Mobile app will be more adapted to meet employees’ daily needs such as submitting and tracking requests or searching for information. Next to these two apps, there is also the Mobile Onboarding app which will enable new hires to fulfill onboarding tasks in few easy steps.
Great effort has been put into the creation of the mobile user-experience. Rather than simply replicating the desktop environment, it really is a mobile-first experience. You can tell this from the significant attention that has been paid to creating a mobile friendly UI, both on iOS and Android devices. This empowers agents, approvers, and fulfillers by granting the opportunity to get their work done anywhere on the go and whenever they want.
A major advantage of these apps is that they do not only give you access to some of the ServiceNow standard functionalities (ITSM, ITBM, CSM, …) but additionally, mobile apps allow you to create your own custom apps using a low-code, no code approach, meaning you do not need to be a full-stack developer.
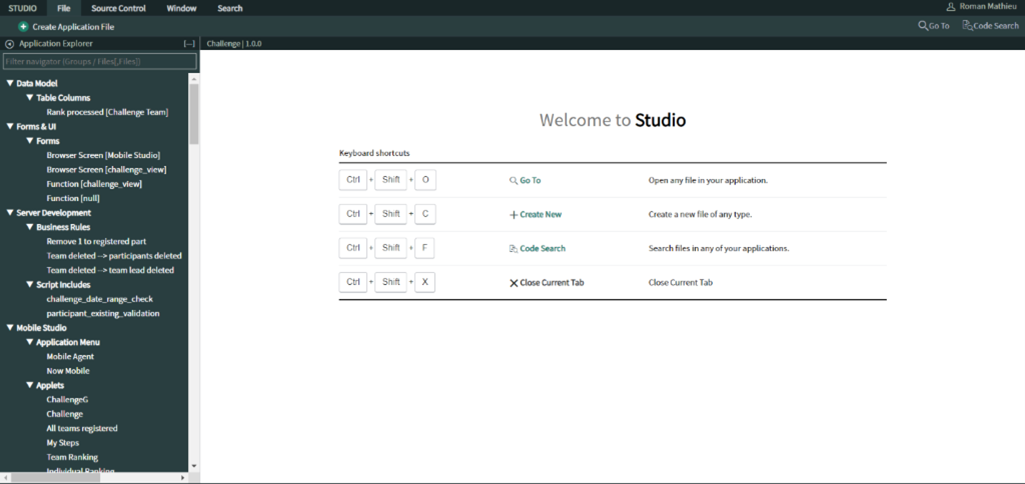
This means that building an app will require the architect to mainly use the many components already available. Today, we will review the four central components that are essential when creating an app. These are: applet launchers, data items, applets and functions. All these components can be managed in one sole interface, called ServiceNow Mobile Studio. With this, anyone in a company can build native mobile applications without writing a single line of code and thus, become what is commonly called a “citizen developer”. This will be showcased by elaborating on the process we experienced ourselves whilst building our very first mobile app, the Steps Challenge App on Now Mobile. (https://www.asp.be/video-asp-steps-challenge/)
Applet Launchers
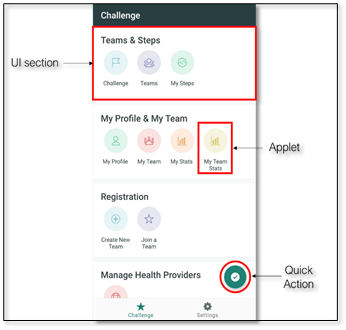
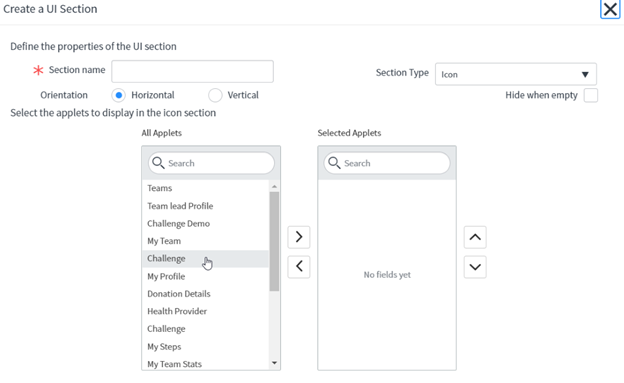
The first component we are going to talk about is the applet launcher. An applet launcher could be compared to a landing page or a home page of an application. This is generally the first page a user encounters as he enters the app. On this page, we can find two kinds of components providing various information. First, UI sections contain applets on which we can click on to navigate through different pages. Secondly, quick actions will give the user the possibility to already execute and pretest some actions from the landing page (see the ‘Function’ paragraph for more information).
In our Steps Challenge Application, we included many UI sections, each one containing multiple applets. Applets can have various roles, which will be described later on. Finally, regarding quick actions, we did not feel the need to include one in our app. Nevertheless, we added one in the picture (Figure 2) to show you where it would be located in your app if you decide that quick actions are necessary.
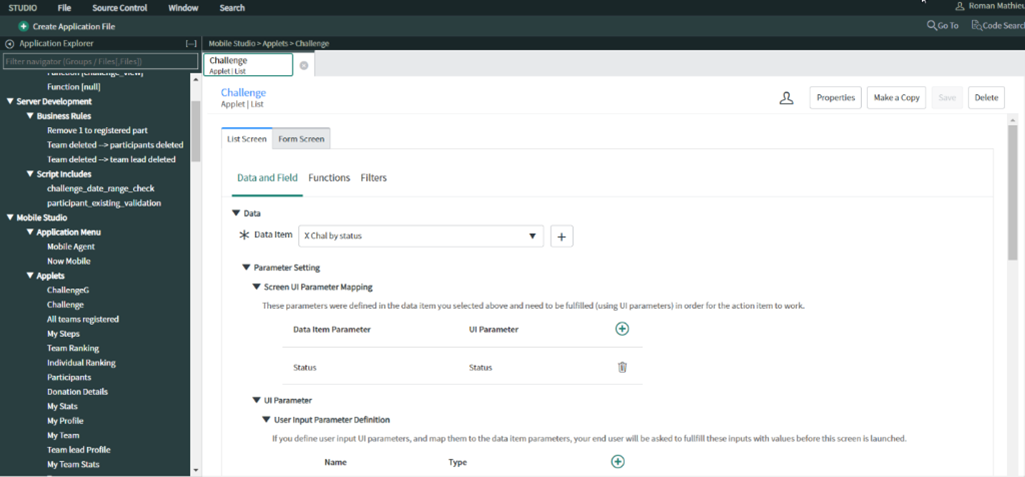
The picture below (Figure 3) shows the Mobile Studio interface for an applet launcher. If we want to add a UI section or a quick action, we simply need to click on the ‘Plus’ button and fill in the information asked (name, content, icon). To add an applet, dragging and dropping them into the proper UI section will be the only thing you have to do…
Applets & Data items
We are now going to go deeper into the so-called ‘applets’ and introduce you to data items: the pieces of information that bring data from your instance to your applets.
An applet is the main component of an app built using ServiceNow. In fact, it is by interacting with them that a user will access information and execute many kinds of actions. When creating an applet, the first thing to do is to determine what data needs to be shown to your users. In other words, you first need to decide what information the data item should contain and how it should be organized.
What table(s) are you going to use ? What filter conditions should you add ? What sorting rule(s) should you implement, if any ? These are all questions you should ask yourself before creating any applet and that you should decide on whilst creating data items. In fact, here we need to put ourselves in user’s shoes and think about how it will all make sense and what should be done to facilitate the user’s interaction with the app. We advise to work towards a minimum viable product and continuously improve it based on user feedback.
A wide variety of applets are accessible when building an app. The most used one is the List applet (in which we can add a Form view). Creating one is really simple and consists of four easy steps to follow:
- Fill in basic information about your applet (name, description, type of applet or pattern and an icon).
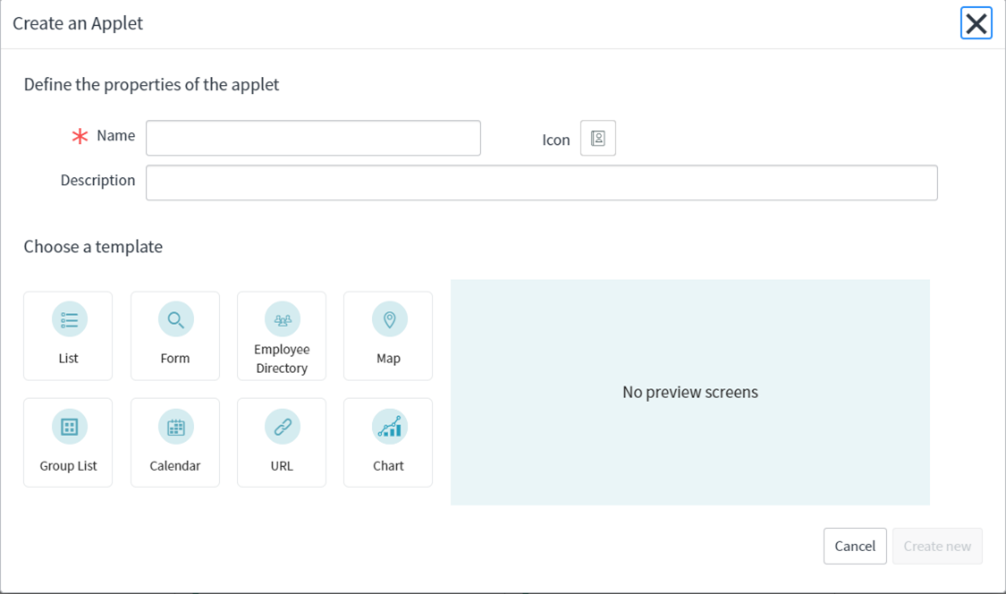
2. Add a data item to your applet by clicking on the ‘+’ sign next to ‘Data Item’ and configure it to catch the correct data from your tables.
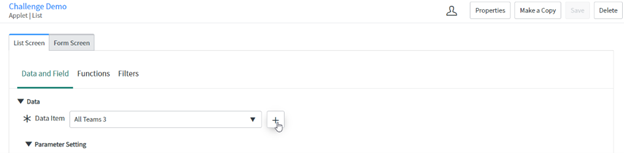
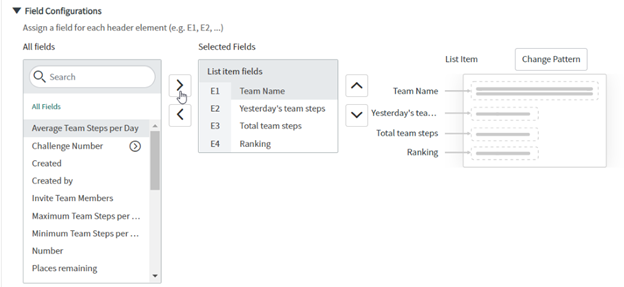
3. Modify the information displayed and their arrangement on the list view. To do so, we simply need to change the pattern and the field in the “field configuration sections” of the applet. Be aware that this interface will be replaced with the Quebec release.
4. Add your applet to one of your UI sections as mentioned above and … you are done !
If we choose to add a form view to the list view, the user will have the possibility to click on a record of the list view, in order to be redirected to the configured form view of this specific record.
Other kinds of applets are provided by ServiceNow. This table contains all existing types.
| Form Applet | Display the form of a record |
| Employee Directory Applet | Display a list of user records |
| Map Applet | Display a map screen |
| Grouped List Applet | Display a list of records that are grouped by a specific field |
| Calendar Applet | Display a calendar screen with records associated with date fields |
| Browser Applet | Open an URL from within the ServiceNow App |
| Chart Applet | Display reports and other user experience analytics widgets. |
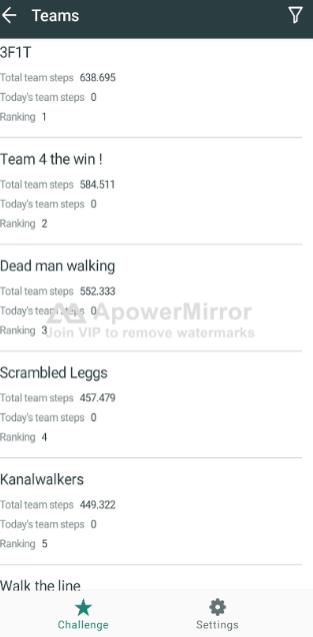
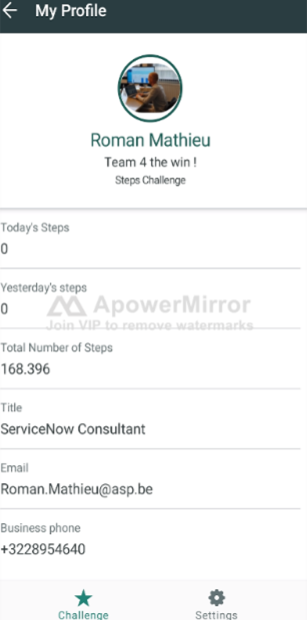
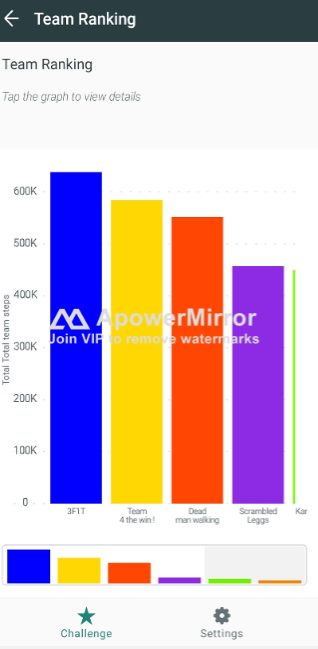
In our Steps Challenge app, we used three kinds of applets. List applets contain a form view or not (this was the case for the ‘Teams’ applet that displayed the information and ranking of every team), Form applets (as ‘My Profile’ or ‘My Team’, where we only wanted information of a specific record) and Chart applets (to display performances of participants in a user-friendly way). Below, you can find these three types of applets.
Functions
Last but not least, functions act as the last key component when it comes to the creation of a Mobile application in ServiceNow. This component is paramount as it will determine the actions a user can perform in the mobile app, and it is therefore important to spend the appropriate time configuring those functions properly, in order to maximize both the functionality and interactivity of your app. Three different functions are available for use in Studio namely “Actions”, “Smart Buttons” and “Navigations”.
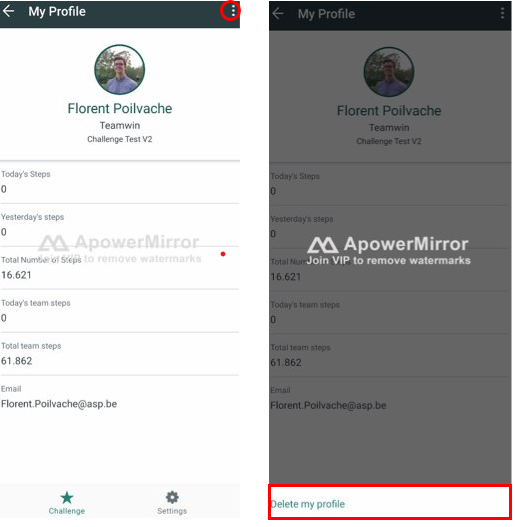
Firstly, “Actions” will allow you to modify data such as editing incidents, assigning a task to yourself or adding a comment. For instance, in our Steps Challenge app, an action function was necessary to allow the participant to delete his profile if he wanted to step out of the challenge (Figure 11).
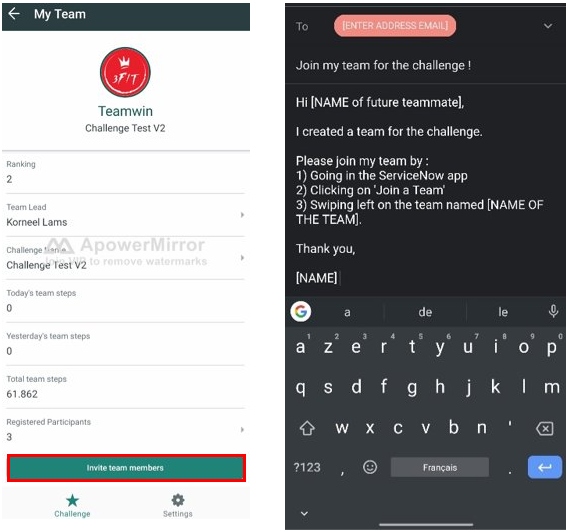
Secondly, Smart Buttons are commonly used to enable users to take action using native capabilities of their mobile devices such as sending an email or initiating a phone call. A practical example in our app was a smart button allowing participants to recruit new team members by sending a custom email (Figure 12).
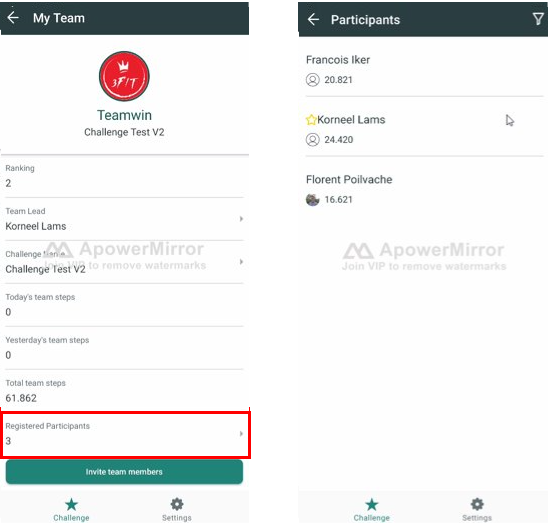
Lastly, Navigations are used to bring a user from his current screen to another applet or applet launcher. Having a look at our Steps Challenge app, we made use of navigation functions frequently so that the participant has easy access to the information from a variety of locations in the app. For instance, clicking on the field that indicates how many participants are registered in a team, redirects the user to the list of the team’s participants and gives details related to their profile (Figure 13).
Furthermore, it is crucial that with every selected function, you think about the context of this function. This can either be at the record level or at the global level, depending on whether or not your function is required to act on an existing record.
The last important choice to make when it comes to implementing these functions is the location from where they will be called upon. In total, there are six different areas to assign functions namely Top Menu (displayed when clicking on the three dots at the top of the screen), Swipe (displayed when swiping on an item), Field (action on an individual field), Footer (button appearing at the bottom of the screen), Quick Action (appearing within a menu on the applet launcher) and finally, the Header (accessible via the header of an applet launcher). An important detail to add here is that, Quick Actions are not accessible at a record level and Headers do not cover functions other than Navigations to an applet. It is therefore recommended to select the function and its context carefully to avoid facing implementation issues.
Conclusion
As you will certainly have noticed throughout this blog post, ServiceNow made it simple for organizations to build and deploy mobile-first experiences for their teams, employees and customers. In a world where managers want to maximize their team members’ productivity, ServiceNow offers an intuitive, simple and productive way to make it happen. At ASP, we decided to explore beyond basic functionalities with our Steps Challenge app . We were pleasantly surprised by the range of possibilities ServiceNow has to offer in order to develop responsive and tailored apps. No matter what your target is, you will probably have a solution that can be built on ServiceNow Mobile to meet the needs of your company.
Questions?
- Directly schedule a meeting with us.
- Reach out to on us solutions@asp.be.