Connect Ansible Automation Platform with ServiceNow CMDB Guide 2025
If you’re already leveraging Ansible to automate IT tasks, why should asset discovery require agents, additional configuration, or redundant credentials? The Ansible Connector for ServiceNow is a lightweight yet powerful integration that enables you to synchronize server configuration data from Ansible Automation Platform (or AWX) into your ServiceNow CMDB, all without deploying agents or altering your Ansible playbooks.
Follow this simple step-by-step guide.
Before you start
Please be aware of these application dependencies:
- ServiceNow Required Plugin:
System Import Sets (com.glide.system_import_set): 1.0.0 or later
- Supported Ansible Platforms:
Red Hat Ansible Automation Platform 2.4 & 2.5 (compatibility with earlier versions possible but untested)
AWX 17.1.0 (compatibility with earlier versions possible but untested)
Note that Ansible core without AAP or AWX is not supported by this app.
1. Install the Ansible Connector for ServiceNow
Get the application here: ServiceNow Store – Ansible Connector
- When application is available to install, navigate to System Application -> All Available Applications -> All
- Locate “Ansible CMDB Connector” and install
2. Configuration
Note: To configure the guided setup for the Ansible CMDB Connector application, the user must have either the “admin” role or the “x_aspas_ansible_co.admin” role. These roles provide the necessary permissions to access and complete the guided setup tasks, ensuring proper configuration of the connection, scheduled imports, and other essential settings.
Open the Guided Setup:
- Navigate to the “Setup” module within the Ansible CMDB Connector application. This setup guide will walk you through each of the configuration steps necessary to complete the setup.
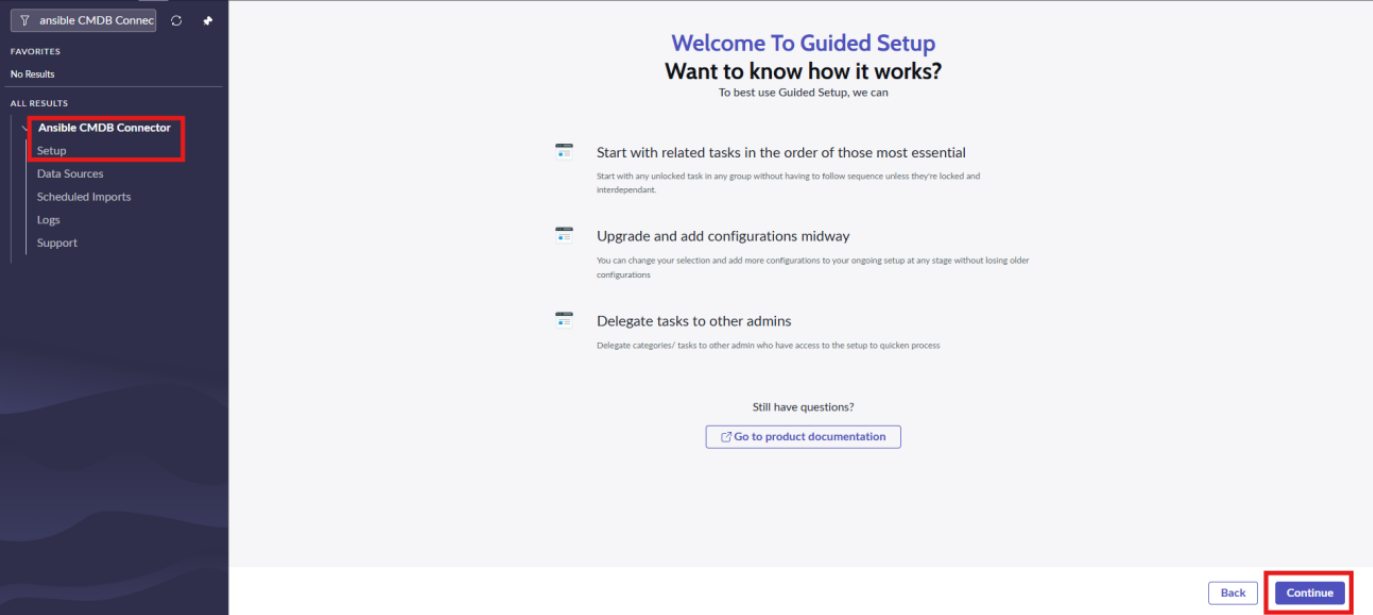
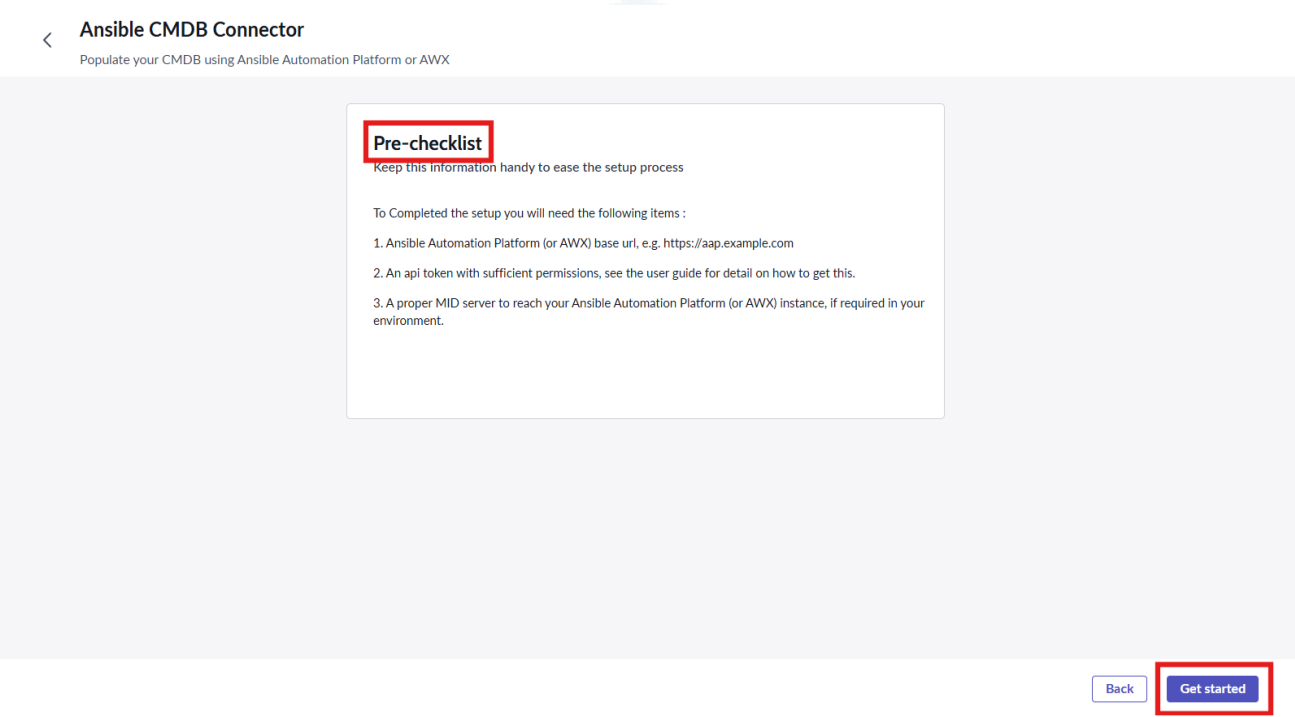
- Before continuing, make sure to review the pre-installation checklist to ensure a smooth and hassle-free setup process. Ensure you’re operating in the “Ansible CMDB Connector” scope (check top-right corner of the UI)
This screen is recorded from the Xanadu version. In the Yokohama version, it may
appear different.
2.1 Configure the connection
Note: Before starting configuration make sure you are in Ansible CMDB Connector scope.
- Start the “Configure Connection” stage.
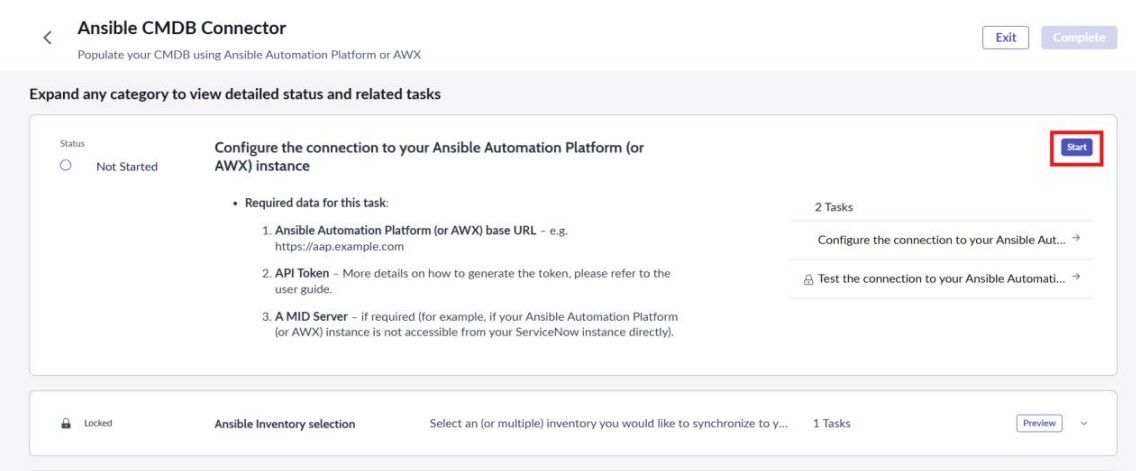
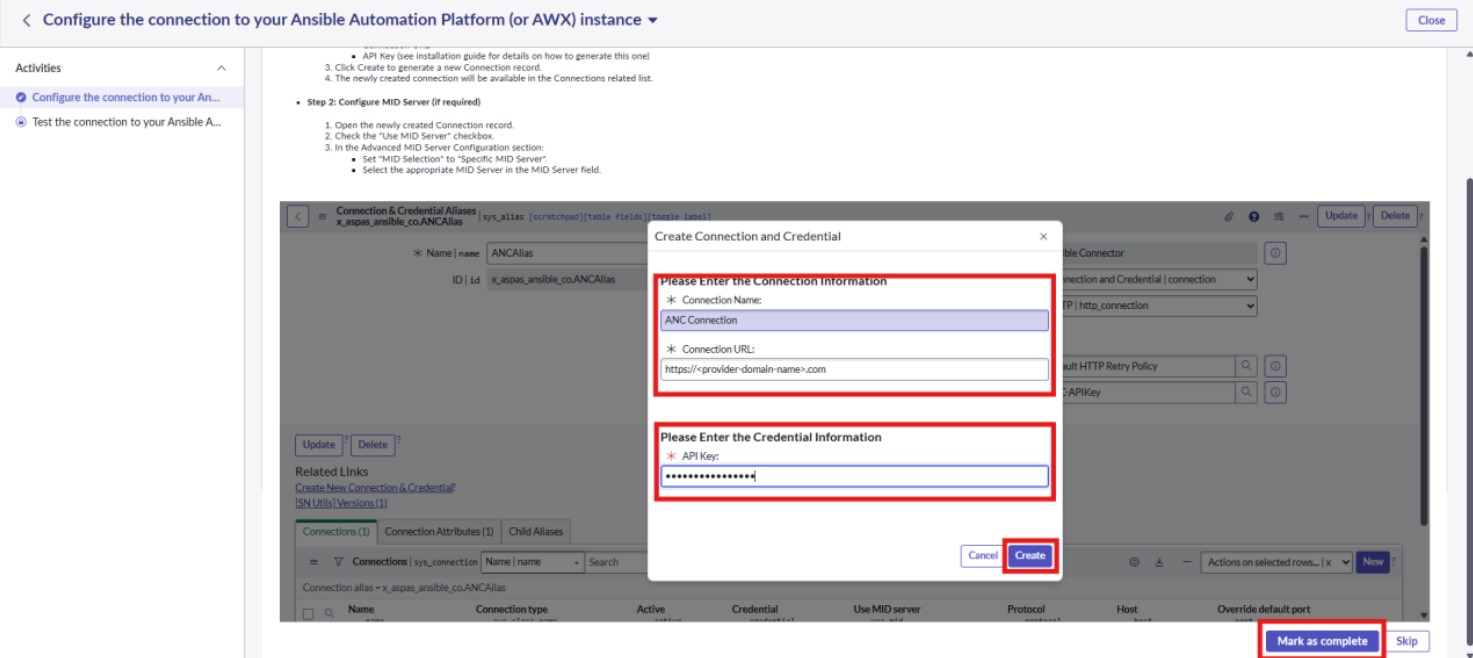
- First guided setup task, you will need to provide the Connection Name and Ansible Automation Platform (or AWX) application details. These details include the Connection URL connection name and API Key. Click the “Create New Connection & Credential” related link. (for extra information regarding the Api key and more see Section 5 External systems connection – Red Hat Ansible Automation Platform (or AWX))
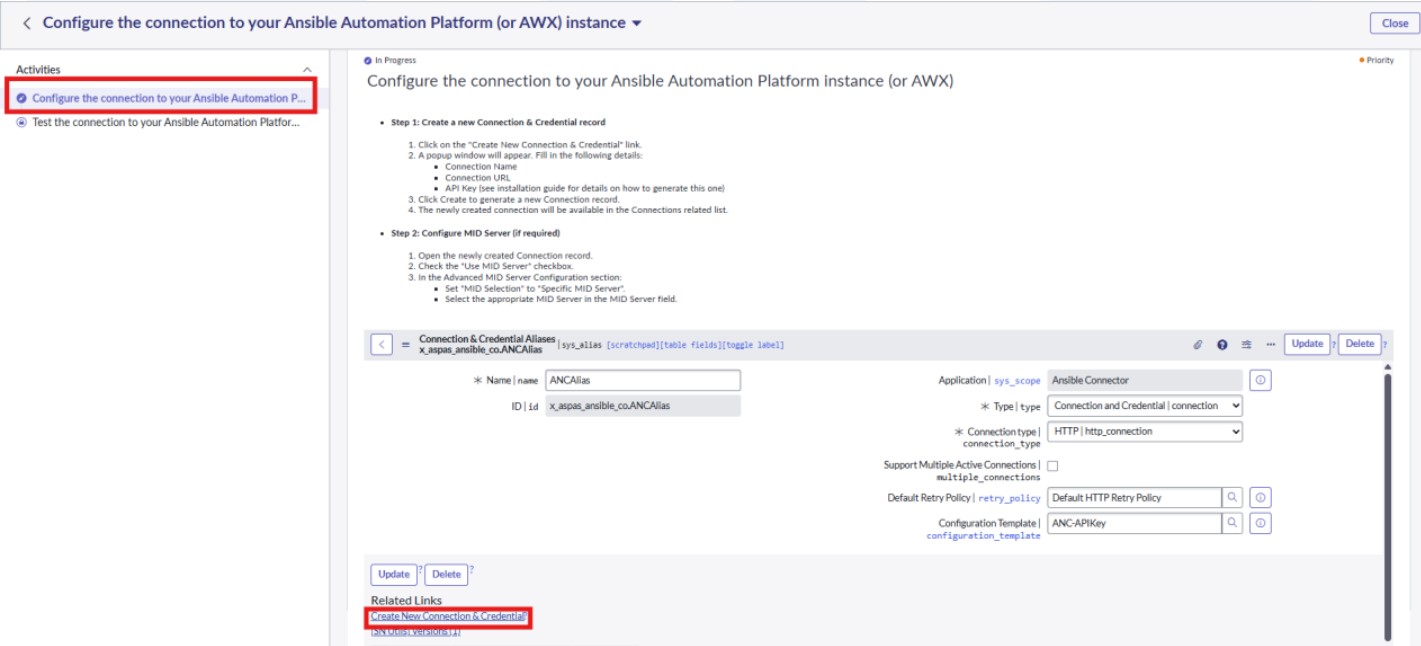
- Follow the prompts in the guided setup to input this information and create a new connection record using the provided template. Once completed, this will establish the connection between ServiceNow and your Ansible Automation Platform (or AWX). Then check the Mark as complete and continue.
2.2 Test the connection
- After configuring the connection, the next step is to validate it. Use the testing task within the guided setup to ensure that the connection to the Ansible Automation Platform (or AWX) is successful.
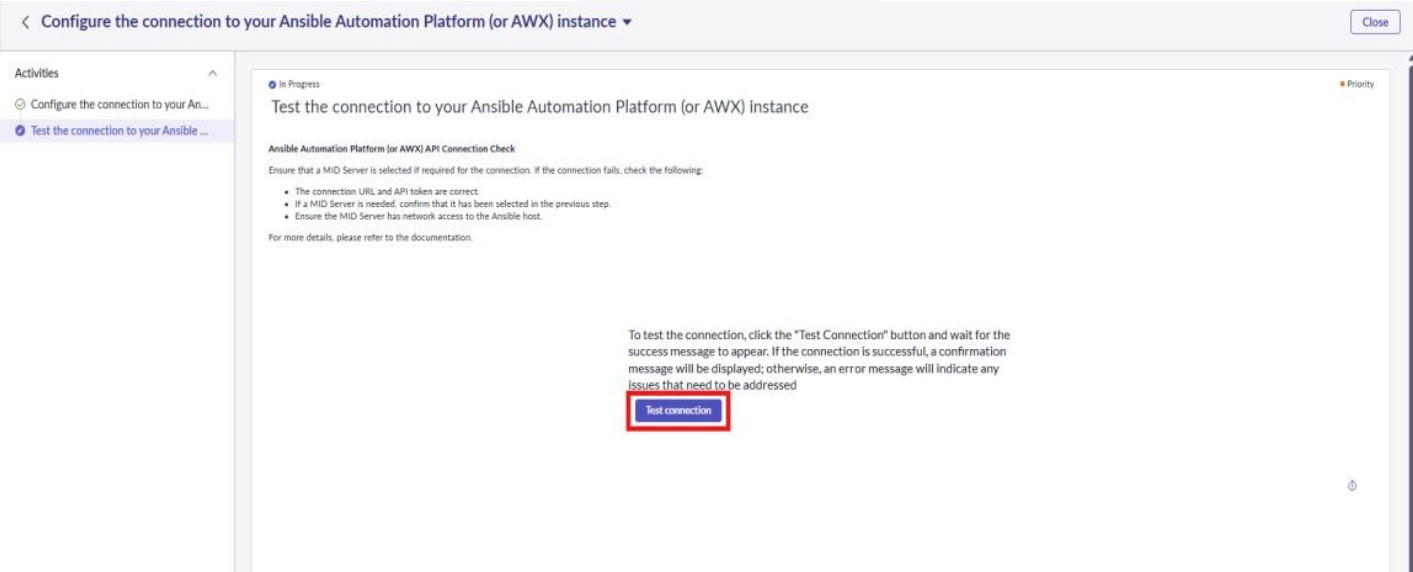
- The test will attempt to retrieve data from AAP (or AWX) to confirm that the connection is properly configured and operational. If the test fails, revisit the connection configuration and ensure that all details are correctly entered. After validating check the Mark as complete and continue.
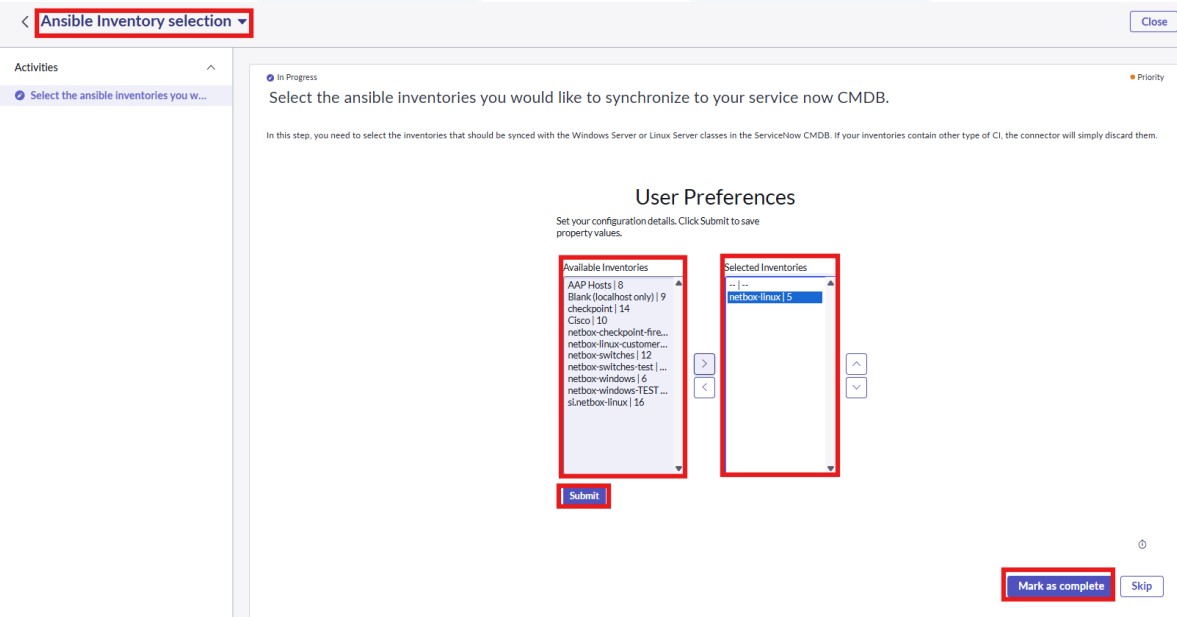
2.3 Ansible Inventory selection
- In this step, you’ll choose which available inventories to use for syncing data into your CMDB.
- Use the slush bucket to move inventories from the right (available) to the left (selected). Only the inventories on the left side will be used to populate your CMDB.
- After selecting the desired inventories, click Submit, then click Mark as complete to proceed.
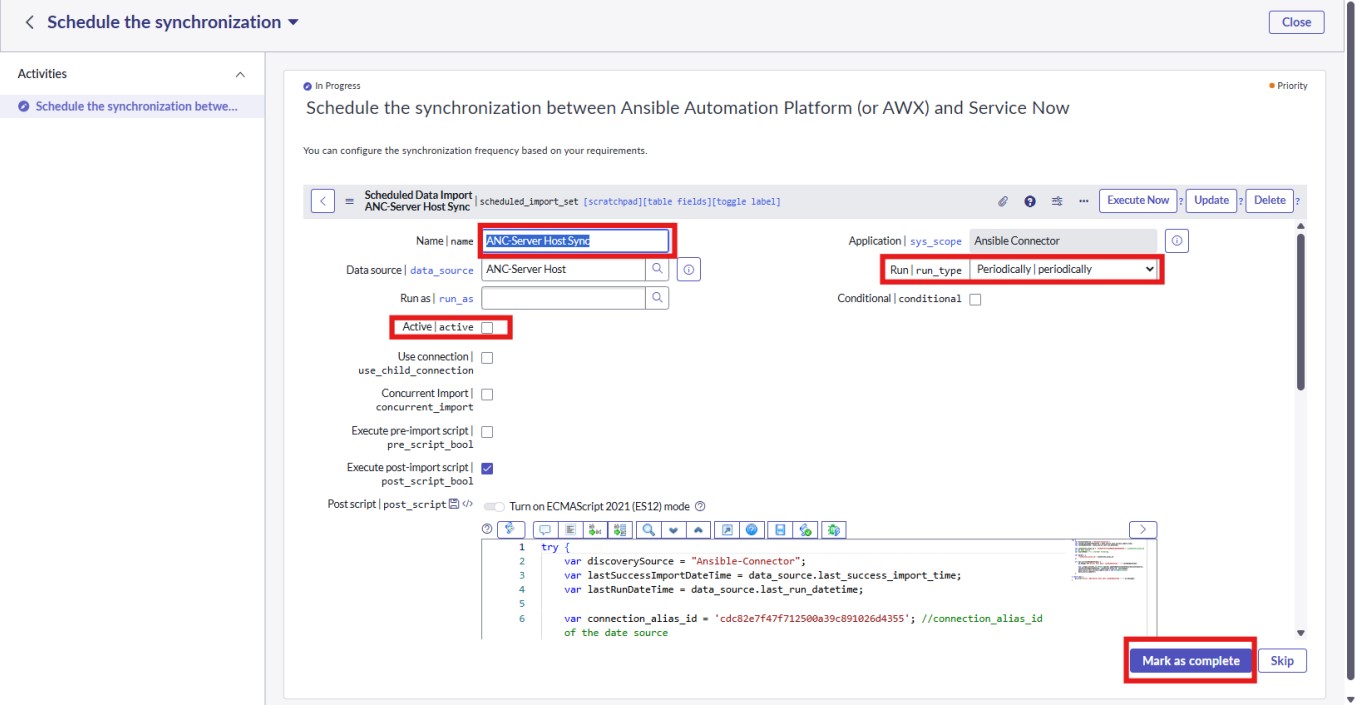
2.4 Configure the Scheduled Imports
- Once the connection is verified and inventories selected, proceed to configure the scheduled imports task in a guided setup.
- In this step, you will activate the scheduled import jobs for Ansible Automation Platform (or AWX) data synchronization. You need to enable the “ANC- Server Host Sync” job.
- Additionally, set the running period (e.g., daily, weekly) for each import job based on your organization’s requirements.
2.5 Completion
- After completing these steps, the Ansible CMDB Connector application should be fully configured and operational.
- The application will now regularly sync data from Ansible Automation Platform (or AWX) into the ServiceNow CMDB according to the configured schedule.

3. External systems connection – Red Hat Ansible Automation Platform (or AWX)
This connector has been tested against:
- Red Hat Ansible Automation Platform 2.4
- Red Hat Ansible Automation Platform 2.5 (latest at the time of development of the connector)
- AWX 24.6 (latest at the time of development of the connector)
The first thing you will need to make use of our connector is an API key for a user capable of reading the Ansible inventories you would like to synchronize to the ServiceNow CMDB.
Please follow the below steps to get one:
3.1 API key and minimal permissions
To run this connector, you will need an API key for the user capable of viewing inventory details.
Here are the steps to configure a basic user for this:
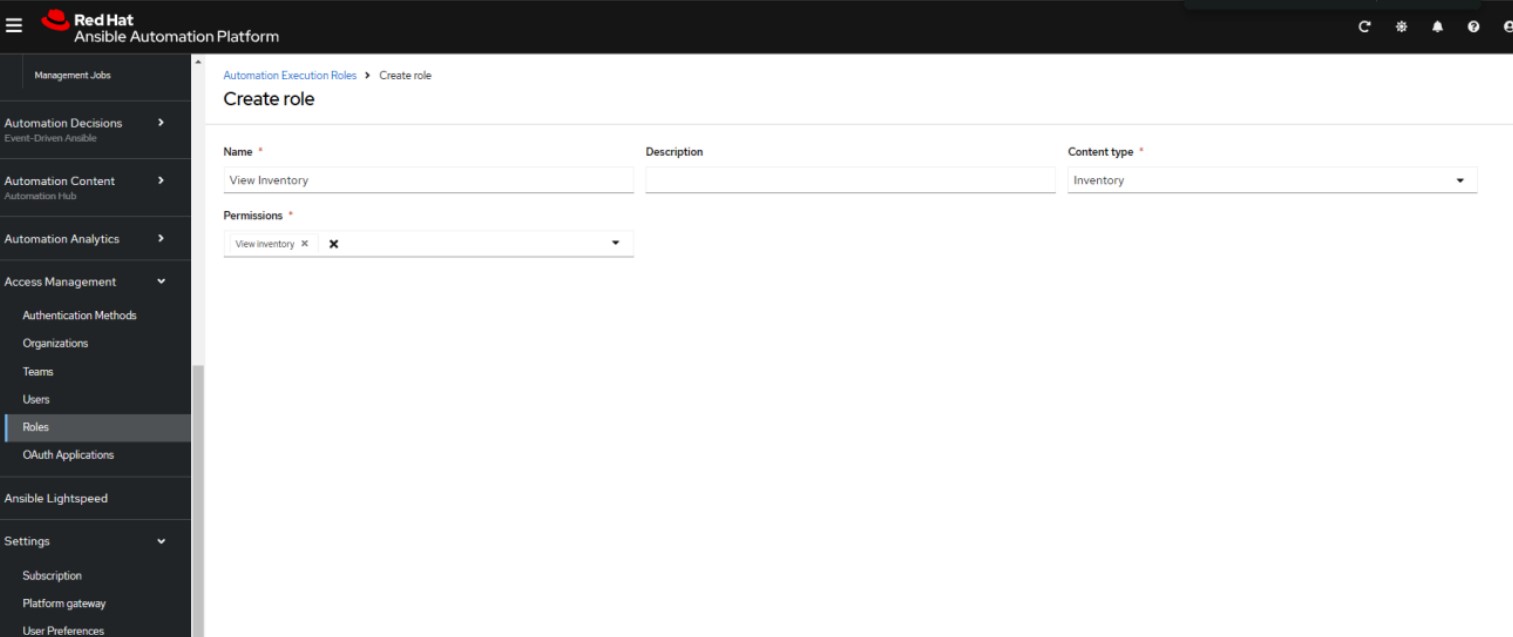
Step 1: Create a role with the minimum required permissions
- Access Management > Roles > Create Role
- Fill a name like “View Inventory”, in Content type select: Inventory, in Permissions select View
- Submit
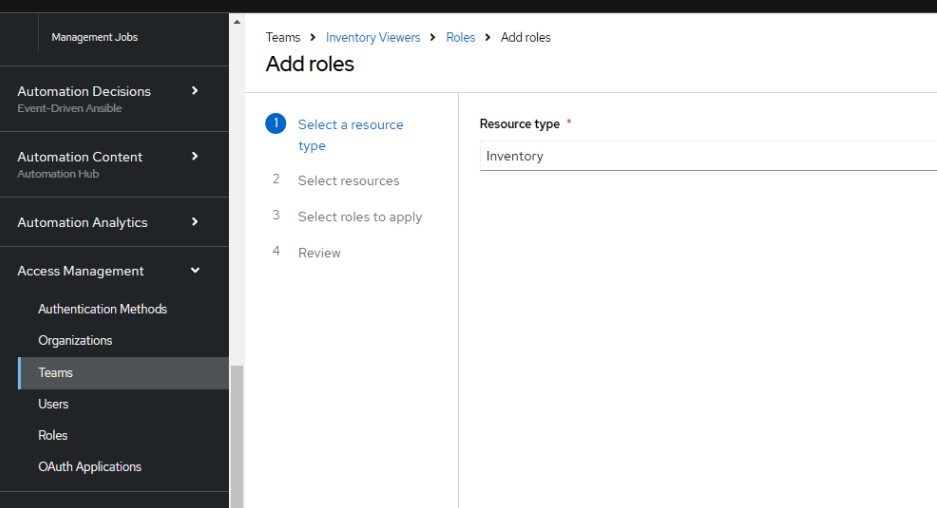
Step 2: Create a Team associated to this new role
- Access Management > Teams > Create Team
- Fill a name like “Inventory Viewers”, assign the right organization to the team, assign the list of
inventories you need to synchronize to service now - Submit
- Edit the team to add the “View Inventory” Role to the team
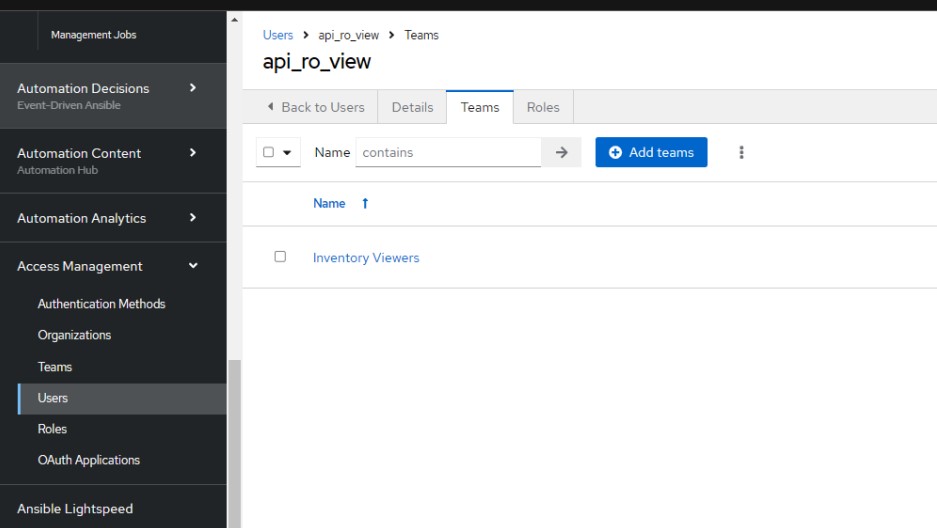
Step 3 : you need to create an account or associate an existing account with this team. This will be the account that will generate the API key that will be used by the connector.
- Access Management > Users > Create Users
- Fill name, password, organization and submit
- Submit
- Edit the user and assign the Inventory Viewers team to it
Step 4: Validate the permissions
- Login with the user in the aap gateway
- Browse something like this: https://ansible_gateway/api/controller/v2/inventories/
If you are using Ansible Automation Platform below 2.5, the path might be this instead: https://ansible_controller/api/v2/inventories/ - If you get a result with inventories in it, you have sufficient permissions for the Ansible CMDB Connector to run properly.
Step 5 : Now we need to generate an API key that will be used by ServiceNow.
Please note that you can only create tokens for the user you are logged in with.
- Users > Select the user you want to create a token for > Token
- Create new token
- Leave application field blank (this will create a Personal Access Token), enter a description, set
read for the scope - Create Token
- Take note of the token as it will be shown only at this very moment

Full documentation on how to create tokens:
https://docs.redhat.com/en/documentation/red_hat_ansible_automation_platform/2.5/html/access_man
agement_and_authentication/gw-token-based-authentication#proc-controller-create-application
3.2 Scheduled fact gathering
To make the most of the connector potential we recommend scheduling a gather fact template regularly on all your servers. It will only read information about them, no action performed against these systems.
Against Linux systems:
Playbook:
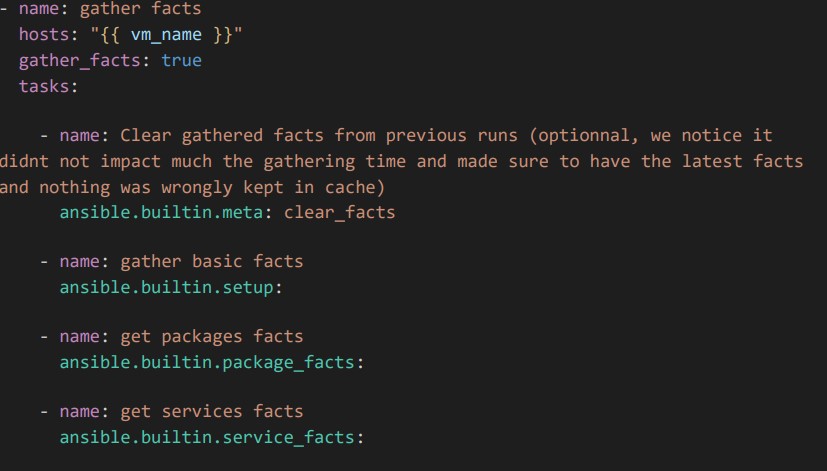
Pay attention that the template must have the following option ticked “Fact storage”, else the
facts will not be available through api.
Enabled options ⍰
Privilege Escalation
Fact storage
Privilege Escalation might not be mandatory for some facts, but information will be more detailed with this option enabled.
Against Windows Hosts:
Playbook:
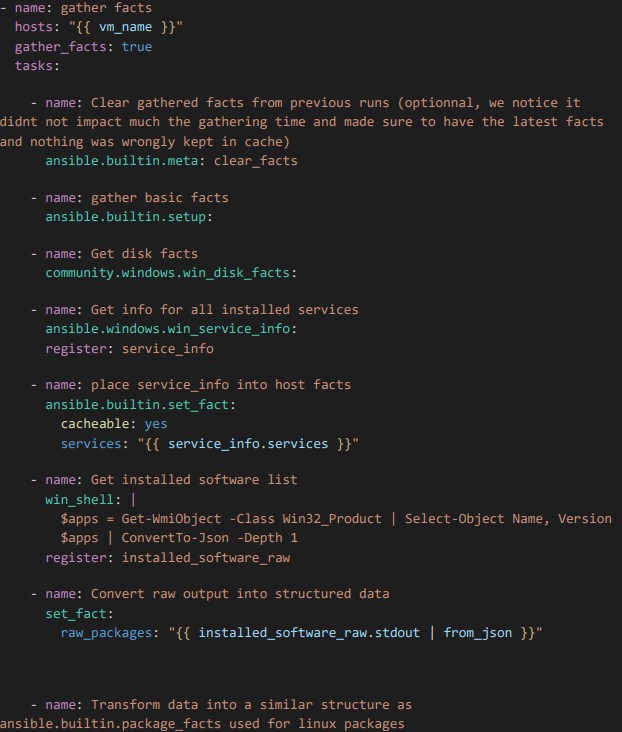

Pay attention that the template must have the following option ticked “Fact storage”, else the
facts will not be available through api:
Enabled options ⍰
Privilege Escalation
Fact storage
Privilege Escalation might not be mandatory for some facts, but information will be more detailed with this option enabled.
These templates should be regularly scheduled. Please refer to the official documentation on how to do that!
Need support?
Do you have specific needs? Do not hesitate to reach out!
- Support Hours of Operation: 8am – 5pm CET
- Support Days of Operation: Monday – Friday (except Belgium public holidays)
- Contact Details:
- +32 2 895 46 00
- Email: servicenowsupport@asp.be